Welcome to the Pioneer Mini Split Manual! This guide provides essential information for installing, operating, and maintaining your mini-split system. Read carefully to ensure safe and optimal use, understanding features, and troubleshooting tips. Safety precautions are emphasized to prevent accidents and ensure longevity of the unit. Proper installation and maintenance are key to efficiency and performance. This manual is your go-to resource for maximizing comfort and energy savings with your Pioneer Mini Split.
1.1 Overview of the Pioneer Mini Split System
The Pioneer Mini Split System is a ductless heating and cooling solution designed for energy efficiency and versatility. It consists of an outdoor unit and an indoor unit connected by refrigerant lines, offering precise temperature control. The system operates in both cooling and heating modes, making it suitable for various climates. With high SEER ratings and advanced inverter technology, it ensures optimal performance while minimizing energy consumption. The compact design allows for easy installation in spaces where traditional ductwork is not feasible. Its quiet operation and sleek appearance make it a popular choice for homes, offices, and commercial spaces. This system is ideal for zoning, providing customized comfort in different areas. Proper installation and maintenance are key to its longevity and efficiency.
1.2 Importance of Reading the Manual
Reading the Pioneer Mini Split Manual is crucial for safe and effective use of your system. It provides detailed instructions for installation, operation, and maintenance, ensuring optimal performance and longevity. The manual highlights safety precautions to prevent accidents and outlines troubleshooting steps for common issues. Understanding the system’s features and settings through the manual enables users to maximize energy efficiency and comfort. Proper installation and operation, as guided by the manual, are essential for warranty validity and system reliability. Whether you’re a homeowner or a technician, this manual serves as an invaluable resource for addressing technical questions and ensuring compliance with manufacturer recommendations.
1.3 Safety Precautions
Adhering to safety precautions is essential when handling your Pioneer Mini Split System. Ensure proper installation by a qualified technician to avoid electrical hazards and refrigerant leaks. Always follow the manufacturer’s guidelines for voltage and power requirements; Keep the system out of reach of children and avoid modifying any components without professional assistance. Regularly inspect the power cord and replace it if damaged. Never operate the unit near flammable materials or in areas with poor ventilation. Proper drainage setup is crucial to prevent water damage and mold growth. Familiarize yourself with emergency shutdown procedures and ensure compliance with local safety regulations. This ensures safe operation and prolongs the system’s lifespan.

Features of the Pioneer Mini Split
The Pioneer Mini Split boasts high-efficiency inverter technology, silent operation, and smart sensors for optimal comfort. Its compact design and eco-friendly features ensure energy savings and durability.
2.1 Key Components of the System
The Pioneer Mini Split system includes essential components that ensure efficient operation. The indoor unit features an evaporator coil and fan, while the outdoor unit houses the compressor and condenser coil. A remote control provides easy operation. Refrigerant pipes connect the indoor and outdoor units, enabling heat transfer. Drainage lines manage condensate removal. Electrical connections and wiring ensure power supply and communication between components. These elements work together to deliver reliable heating and cooling performance, making the system both functional and user-friendly.
2.2 Energy Efficiency and SEER Ratings
The Pioneer Mini Split system is designed with energy efficiency in mind, featuring high SEER (Seasonal Energy Efficiency Ratio) ratings. SEER measures cooling efficiency over a season, with higher ratings indicating better performance. Pioneer models typically range from 16 to 22 SEER, exceeding industry standards. This high efficiency reduces energy consumption and lowers utility bills. By optimizing compressor and fan speeds, the system minimizes energy waste. The inverter technology also contributes to consistent temperatures while saving energy. These features ensure the Pioneer Mini Split is both eco-friendly and cost-effective, making it a smart choice for homeowners seeking reliable, energy-efficient heating and cooling solutions.
2.3 Inverter Technology
The Pioneer Mini Split system incorporates advanced inverter technology, which adjusts the compressor and fan speeds to match heating or cooling demands. Unlike traditional fixed-speed systems, the inverter technology allows for variable speed operation, reducing energy consumption and noise levels. This technology ensures consistent temperatures, eliminating frequent startups and shutdowns. It also enhances system reliability and prolongs equipment lifespan. By adapting to room conditions, the inverter optimizes performance, providing faster cooling and heating while maintaining energy efficiency. This feature is particularly beneficial for maintaining comfort in varying climates and usage patterns, making the Pioneer Mini Split a versatile and reliable choice for modern heating and cooling needs.

Technical Specifications
This section provides detailed technical specifications, including BTU ratings, voltage requirements, and system dimensions, ensuring compatibility and proper installation for optimal performance.
3.1 BTU Ratings and Capacities
The Pioneer Mini Split systems are available in various BTU ratings, ranging from 9,000 to 24,000 BTU, catering to different room sizes and cooling/heating needs. The BTU rating determines the system’s capacity to cool or heat a space efficiently. For example, a 9,000 BTU unit is suitable for small rooms (up to 300 square feet), while a 24,000 BTU unit can handle larger spaces (up to 1,000 square feet). Properly matching the BTU rating to the room size ensures optimal performance and energy efficiency. Always refer to the manual or consult a professional to select the correct capacity for your space.
3.2 Voltage and Power Requirements
The Pioneer Mini Split systems operate on standard household electrical requirements, typically requiring 208/230V AC power. The specific voltage and power consumption vary by model, but most units range between 3.5 and 16 amps. It is essential to ensure your electrical system can support the unit’s power requirements to avoid potential issues like power shortages or component damage. Always consult the manual or a licensed electrician to confirm compatibility with your home’s electrical setup. Proper wiring and circuit installation are critical for safe and efficient operation. Failure to meet these requirements may result in reduced performance or safety hazards.
3;3 Dimensions and Weight
The Pioneer Mini Split systems are designed to be compact and lightweight, ensuring easy installation and minimal space requirements. Indoor units typically measure around 40 inches in length, 12 inches in height, and 8 inches in depth, weighing approximately 20 pounds. Outdoor units are slightly larger, with dimensions of about 30 inches in length, 16 inches in width, and 12 inches in height, weighing around 80 pounds. These measurements may vary slightly depending on the specific model and capacity. Proper handling and installation require knowledge of these dimensions and weights to ensure safe placement and operation. Always refer to the manual for exact specifications to plan your installation accurately.
3.4 Compatible Models and Configurations
The Pioneer Mini Split system offers a range of compatible models designed to meet various installation and performance needs. These systems are available in single-zone and multi-zone configurations, allowing users to customize their setup based on space requirements. Single-zone models are ideal for heating or cooling individual rooms, while multi-zone systems can connect multiple indoor units to a single outdoor unit, providing flexibility for larger spaces. The manual provides detailed compatibility charts to ensure proper pairing of indoor and outdoor units. Additionally, the systems are compatible with a variety of optional accessories, such as wired and wireless controllers, to enhance functionality. Always consult the manual to verify compatibility before installation or upgrades.
3.5 AHRI Certification and Compliance
The Pioneer Mini Split system is AHRI (Air-Conditioning, Heating, and Refrigeration Institute) certified, ensuring it meets rigorous industry standards for performance and efficiency. AHRI certification verifies that the system’s heating and cooling capacities, as well as its energy efficiency ratings, are accurately represented. Compliance with AHRI standards guarantees that the system operates safely and efficiently, adhering to established guidelines for indoor air quality and environmental impact. This certification also ensures that the system meets local and national regulatory requirements, providing users with peace of mind regarding its reliability and performance. Always check the AHRI certification label to confirm compliance before installation.

Installation Guidelines
Proper installation ensures optimal performance and safety. Follow manufacturer instructions, hire qualified professionals, and adhere to safety protocols to avoid system damage or efficiency loss.
4.1 Pre-Installation Requirements
Before installing the Pioneer Mini Split, ensure the installation site meets all requirements. Check space dimensions, electrical supply, and drainage options. Verify compatibility with local building codes and regulations. Plan the layout to avoid obstructions and ensure proper airflow. Gather necessary tools and materials, such as drills, wrenches, and insulation. Ensure the area is clean and free from debris. Verify the system’s voltage and power requirements match your electrical setup. Consult local authorities for permits if required. Safety gear, such as gloves and goggles, should be worn during installation. Proper preparation ensures a smooth and safe installation process, minimizing potential issues and ensuring optimal system performance.
4.2 Outdoor Unit Installation
Install the outdoor unit on a firm, level surface, ensuring it is at least 12 inches away from any obstructions. Choose a location with adequate airflow and protection from direct sunlight and heavy rain. Use a concrete pad or sturdy mounting bracket to secure the unit. Ensure proper drainage by tilting the unit slightly. Maintain a minimum clearance of 12 inches around the unit for maintenance access. Connect the refrigerant lines and electrical connections securely, following the manual’s guidelines; Tighten all bolts and screws firmly to prevent vibration. Ensure the unit is grounded properly for safety. If installing on a roof or elevated surface, use appropriate safety gear and consider professional assistance for handling heavy components.
4.3 Indoor Unit Installation
Mount the indoor unit on a wall or floor, ensuring it is level and securely fastened. For wall mounting, use the provided bracket and drill holes at the marked locations. Ensure the unit is at least 7 feet above the floor for optimal airflow. Connect the refrigerant and drainage lines to the outdoor unit, following the manual’s instructions. Install the drainage hose securely, ensuring it slopes downward to prevent water buildup. Connect the electrical wires, matching the colors to the corresponding terminals. Turn on the power and test the unit to ensure proper operation. Check for any leaks or vibrations and tighten all connections if necessary. Allow 24 hours before full operation to let the system stabilize.
4.4 Refrigerant Pipe and Drainage Setup
Connect the refrigerant pipes between the indoor and outdoor units, ensuring they are properly insulated to prevent energy loss. Use a vacuum pump to remove air and moisture from the lines before charging with refrigerant. Install the drainage hose securely, routing it to a suitable drain location. Ensure the hose is sloped correctly to avoid water pooling. Tighten all connections firmly and check for leaks using a refrigerant leak detector. Avoid kinking or bending the refrigerant lines excessively, as this can restrict flow. Once connected, turn on the system and monitor for proper operation. If any issues arise, consult a professional to address them promptly.
4.5 Electrical Connections and Wiring
Connect the indoor and outdoor units using the provided electrical wires, ensuring all connections are secure and match the manual’s wiring diagram. Verify the power supply matches the system’s voltage requirements. Install a dedicated circuit breaker to prevent overloading. Connect the outdoor unit to the power source first, then link it to the indoor unit. Use the correct gauge wire to minimize resistance and heat buildup. Double-check all connections for tightness and insulation. If unsure, consult a licensed electrician to ensure compliance with local electrical codes. Turn on the power and test the system to confirm proper operation. Always disconnect power before servicing or adjusting wiring.

Operating the Pioneer Mini Split
Operate your Pioneer Mini Split using the remote control, selecting modes like cooling, heating, fan-only, or dehumidification. Adjust fan speed for optimal airflow and comfort. Use the timer feature for energy-efficient scheduling.
5.1 Understanding the Remote Control
The remote control for your Pioneer Mini Split is designed for easy operation. It features a user-friendly interface with buttons for mode selection, temperature adjustment, fan speed control, and timer settings. The LCD display shows the current temperature and operational mode. Key buttons include the power button, mode button (cool, heat, fan, dry), temperature up/down arrows, fan speed adjust, and timer on/off. Additional features may include a turbo mode for faster cooling or heating and a quiet mode for reduced noise. Familiarize yourself with the remote’s layout to optimize your system’s performance and comfort. Regularly replace the batteries to ensure uninterrupted use.
5.2 Setting Up the System for First Use
Before operating your Pioneer Mini Split for the first time, ensure all components are properly installed and connected. Place the indoor and outdoor units in their designated locations, ensuring proper clearance. Connect the refrigerant lines, drainage hose, and electrical connections as outlined in the installation section. Plug in the outdoor unit and ensure the power supply matches the system’s voltage requirements. Insert the batteries into the remote control and pair it with the system; Turn on the power and test the system by selecting a mode (cool, heat, or fan) and adjusting the temperature. Allow the system to run for a few minutes to check for leaks or unusual noises. Refer to the manual for specific startup instructions for your model.
5.3 Cooling and Heating Modes
The Pioneer Mini Split offers multiple operating modes to suit your comfort needs. In Cool Mode, the system lowers the room temperature by circulating refrigerated air. Heat Mode warms the space by reversing the refrigeration process. Fan Mode circulates air without cooling or heating, ensuring even airflow. To switch modes, use the remote control and press the “Mode” button until the desired option is displayed. Adjust the temperature using the up or down arrows, and set the fan speed to low, medium, or high for personalized comfort. The system also features an energy-saving design, automatically adjusting operations to maintain efficiency while providing consistent comfort. Always refer to the manual for specific mode settings and optimization tips.
5.4 Fan Speed and Airflow Control
The Pioneer Mini Split allows you to adjust fan speed and airflow for optimal comfort. Use the remote control to select from Low, Medium, or High fan speeds. The Auto mode automatically adjusts the fan speed based on the room temperature. For precise airflow control, the system includes louvers that can be manually adjusted to direct air flow upward, downward, or to the sides. This feature ensures even air distribution and prevents cold or hot spots. Adjusting the fan speed and airflow helps maintain consistent temperatures while minimizing energy consumption. Regularly cleaning the air filters ensures proper airflow and system efficiency. Always refer to the manual for detailed instructions on optimizing fan settings for your space.
5.5 Timer and Scheduling Features
The Pioneer Mini Split offers advanced timer and scheduling features for convenient operation. Use the remote control to set a 24-hour timer, allowing you to turn the system on or off automatically. This feature is ideal for saving energy by ensuring the system operates only when needed. You can also schedule cooling or heating sessions in advance, providing consistent comfort without manual adjustments. The timer can be programmed using the remote’s navigation buttons and confirmed with the “Set” button. Additionally, the system allows you to set multiple timers for different times of the day. These features enhance energy efficiency and ensure your space remains comfortable while minimizing energy waste.

Maintenance and Care
Regular maintenance ensures optimal performance and longevity of your Pioneer Mini Split. This includes cleaning filters, inspecting coils, checking refrigerant levels, and scheduling professional servicing to maintain efficiency and prevent breakdowns.
6.1 Cleaning the Air Filters
Cleaning the air filters is essential for maintaining your Pioneer Mini Split’s performance and energy efficiency. Turn off the power before removing the filters. Gently vacuum or wash them with mild soap and water. Allow them to dry completely before reinstalling. Clean filters every 1-3 months, depending on usage. Clogged filters can reduce airflow and increase energy consumption. Regular maintenance ensures proper air quality and system efficiency. Always refer to the manual for specific cleaning instructions. Avoid using harsh chemicals or abrasive materials that could damage the filters. Properly cleaned filters will enhance cooling, heating, and overall system operation. Schedule regular cleaning to maintain optimal performance and extend the system’s lifespan.
6.2 Drainage Maintenance
Drainage maintenance is crucial for preventing water accumulation and ensuring your Pioneer Mini Split operates efficiently. Regularly inspect the drain hose for kinks or blockages, ensuring it is properly positioned. Check the drain pan for debris or mold buildup and clean it as needed. Use a soft cloth or brush to remove any obstructions. If water leakage occurs, inspect the drain system for cracks or loose connections. Clean the condensate drain line periodically by flushing it with water to remove algae or sediment. Proper drainage prevents water damage and maintains indoor air quality. Refer to the manual for specific drainage maintenance recommendations tailored to your model.
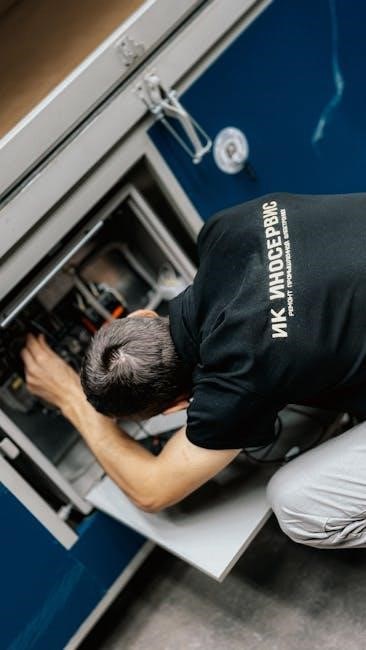
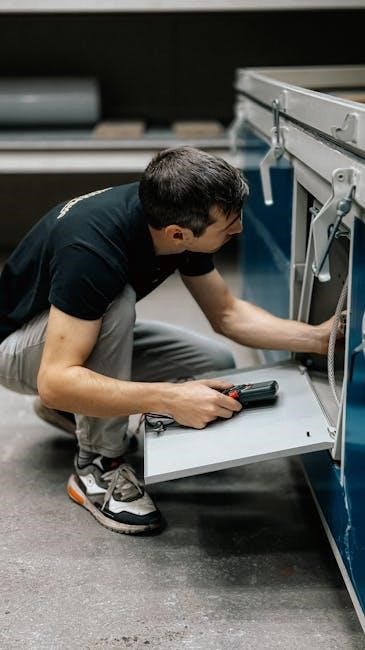
6.3 Coil Cleaning and Inspection

Regular cleaning and inspection of the Pioneer Mini Split coils are essential for maintaining efficiency and performance. Turn off the power before cleaning to avoid damage or injury. Use a soft brush or vacuum to gently remove dust and debris from the indoor and outdoor coils. For tougher dirt, mix water and mild detergent, and apply it with a soft cloth. Avoid using harsh chemicals or abrasive materials that could damage the coil surfaces. Inspect the coils for bent fins and straighten them carefully using a fin comb. Clean the coils every 1-2 months or as needed, depending on usage and environmental conditions. Proper maintenance ensures optimal airflow and energy efficiency;
6.4 Checking Refrigerant Levels
Regularly checking the refrigerant levels in your Pioneer Mini Split ensures optimal performance and efficiency. Low refrigerant levels can lead to reduced cooling or heating capacity and increased energy bills. To check the levels, turn off the system and allow it to cool down. Use a manifold gauge set to measure the pressure of the refrigerant. Connect the gauge to the service ports on the outdoor unit, ensuring the valves are properly opened. Compare the readings with the manufacturer’s specifications, usually found in the manual. If the levels are low, it may indicate a leak, which requires professional attention. Always handle refrigerant with care, as improper handling can cause safety hazards. Schedule annual checks by a certified technician to maintain system health.
6.5 Scheduling Professional Maintenance
Scheduling professional maintenance for your Pioneer Mini Split is crucial for maintaining peak performance, efficiency, and longevity. A certified technician will inspect and clean components, check for refrigerant leaks, and ensure proper airflow. They will also verify electrical connections, inspect the compressor, and test system operation. Regular maintenance prevents potential issues before they escalate, ensuring reliable cooling and heating. Schedule maintenance annually, preferably before heavy usage seasons, to avoid breakdowns. Professional tune-ups also help maintain warranty compliance and optimize energy efficiency. Keep a record of all maintenance visits for future reference. Always choose a licensed HVAC technician familiar with Pioneer systems for accurate and reliable service.
Troubleshooting Common Issues
Troubleshooting common issues with your Pioneer Mini Split involves identifying error codes, checking for power issues, and ensuring proper installation. Refer to the error code list in the manual for specific solutions. If problems persist, contact a certified technician for assistance. Regular maintenance can prevent many common issues. Always follow safety guidelines when troubleshooting to avoid further damage or safety risks.
7.1 Error Codes and Their Meanings
The Pioneer Mini Split system displays error codes to indicate specific issues. These codes, such as E1, E2, or E3, are listed in the manual with their corresponding meanings. For example, E1 often relates to sensor malfunctions, while E2 may indicate communication failures between indoor and outdoor units. Understanding these codes helps users diagnose problems quickly. If an error occurs, refer to the manual for the code’s definition and recommended solutions. Some issues, like sensor errors, may require professional intervention, while others, such as power failures, can be resolved by resetting the system. Always follow the manual’s guidance to avoid further complications.
7.2 Common Operational Problems
Common operational issues with the Pioneer Mini Split may include uneven cooling, insufficient airflow, or unexpected noise. These problems often arise from improper installation, blocked air filters, or incorrect thermostat settings. For instance, if the system fails to cool or heat effectively, it may indicate low refrigerant levels or a malfunctioning compressor. Strange noises could signal loose parts, dirty fans, or improper unit alignment. Addressing these issues promptly is crucial to maintain efficiency and prevent further damage. Always refer to the manual for troubleshooting steps or contact a certified technician for complex repairs. Regular maintenance, such as cleaning filters and inspecting coils, can help minimize these operational challenges.
7.3 Refrigerant Leaks and Solutions
A refrigerant leak is a critical issue that can significantly reduce the performance of your Pioneer Mini Split system. Signs of a leak include reduced cooling or heating capacity, hissing sounds, or ice buildup on the coils. If a leak is suspected, turn off the system immediately to prevent further damage. Inspect the refrigerant lines for visible damage or corrosion, and check for leaks using a refrigerant leak detector. If a leak is confirmed, contact a certified technician to recharge the refrigerant and seal the system. Ignoring this issue can lead to higher energy bills, reduced system lifespan, and potential environmental harm. Always follow the manual’s guidelines for handling refrigerant-related issues.

Energy Efficiency and Savings
Maximizing energy efficiency with your Pioneer Mini Split involves proper installation, regular maintenance, and smart usage habits. These practices ensure optimal performance and significant energy savings.
8.1 Understanding SEER and EER Ratings
SEER (Seasonal Energy Efficiency Ratio) and EER (Energy Efficiency Ratio) are critical metrics for evaluating the Pioneer Mini Split’s energy efficiency. SEER measures efficiency over an entire cooling season, while EER reflects performance at fixed outdoor temperatures. Higher ratings indicate better energy savings and lower utility bills. For Pioneer systems, SEER ratings range from 13 to 23, and EER ratings range from 11 to 13, depending on the model. Understanding these ratings helps users select the most energy-efficient unit for their needs, ensuring long-term savings and reduced environmental impact.
- SEER measures seasonal efficiency.
- EER reflects fixed-temperature efficiency.
- Higher ratings mean greater energy savings.
8.2 Optimizing Energy Consumption
To maximize energy savings with your Pioneer Mini Split, consider several strategies. Use the timer and scheduling features to operate the system only when needed. Adjust the temperature settings slightly to reduce workload without sacrificing comfort. Regular maintenance, like cleaning air filters and coils, ensures optimal performance; Utilize the energy-saving mode and eco-fan settings to minimize power usage. Proper installation and insulation of the unit also enhance efficiency. By combining these practices, you can significantly lower energy consumption while maintaining desired comfort levels. These optimizations not only save money but also extend the system’s lifespan and environmental benefits.
- Use timer and scheduling features wisely.
- Adjust temperature settings for efficiency.
- Maintain the system regularly.
- Enable energy-saving and eco-fan modes.
- Follow manual guidelines for optimal performance.
- Regular maintenance ensures longevity.
- Utilize advanced features for efficiency.
- Refer to the manual for troubleshooting.