The Kenmore 12 Stitch Sewing Machine Manual is essential for understanding and operating your machine effectively. It provides detailed guidance on features like the 12 built-in stitches, Ultra Stitch for uniformity, and Sew-by-Color for easy selection. The manual also covers maintenance, threading, and troubleshooting, ensuring you master your machine’s capabilities.
1.1 Why the Manual is Essential for Operation
The Kenmore 12 Stitch Sewing Machine Manual is crucial for maximizing your machine’s potential. It explains how to use the 12 built-in stitches, Ultra Stitch feature, and Sew-by-Color system. Without the manual, you may struggle to understand the machine’s components, troubleshoot common issues, or perform routine maintenance. It serves as a comprehensive guide to ensure safe and efficient operation, helping you achieve professional-quality results and extend the machine’s lifespan. Referencing the manual ensures you unlock all features and maintain optimal performance.
1.2 How to Access the Manual (Download Options)
The Kenmore 12 Stitch Sewing Machine Manual can be easily accessed online. Visit the official Kenmore website or Sears Parts Direct for free PDF downloads. Third-party sites like ManualsLib and ManualsOnline also offer free access. For a small fee, high-quality manuals are available on platforms like ManualsOnline. Simply search by model number, such as Kenmore 158.1595, to find and download the manual instantly. This ensures you have all the necessary instructions at your fingertips for optimal machine operation and maintenance.
1.3 Structure and Content Overview
The Kenmore 12 Stitch Sewing Machine Manual is structured to guide users from setup to advanced techniques. It begins with an introduction to machine features, followed by detailed sections on operation, maintenance, and troubleshooting. The manual includes step-by-step guides for threading, using presser feet, and adjusting stitch settings. Diagrams and illustrations are provided to clarify complex processes, while troubleshooting sections address common issues. This comprehensive layout ensures users can efficiently navigate and utilize their machine’s full potential, making it an indispensable resource for sewers of all skill levels.
Key Features of the Kenmore 12 Stitch Sewing Machine
The Kenmore 12 Stitch Sewing Machine offers 12 built-in stitches, Ultra Stitch for uniformity, and Sew-by-Color for easy selection. It also features a full rotary shuttle and various presser feet options, enhancing versatility and performance for diverse sewing projects.
2.1 Overview of the 12 Built-In Stitches
The Kenmore 12 Stitch Sewing Machine features 12 versatile built-in stitches, including straight stitch, zigzag, and stretch stitches. These stitches cater to various fabrics and sewing needs, from delicate cotton to heavy-duty denim. The machine also includes decorative and utility stitches, allowing for creative projects and everyday repairs. The stitches are easily selectable, making it simple to switch between different sewing tasks. This variety ensures that users can handle a wide range of sewing projects with precision and ease, enhancing both functionality and creativity.
2.2 Ultra Stitch Feature for Uniform Stitching
The Ultra Stitch feature ensures consistent and uniform stitching, making it ideal for achieving professional-quality results. This feature regulates stitch length and width, providing even fabric penetration and a polished finish. It is particularly useful for sewing delicate or thick materials, as it maintains steady stitching without manual adjustments. The Ultra Stitch feature enhances precision and reliability, making it a standout function for both beginners and experienced sewists. It simplifies the sewing process, allowing users to focus on creativity while the machine handles stitch consistency.
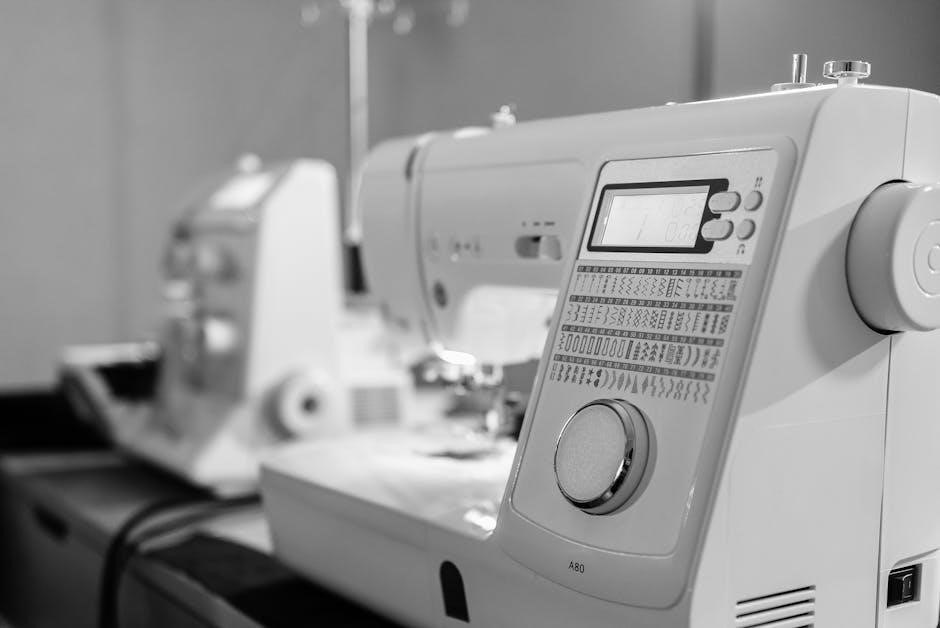
2.3 Sew-by-Color Feature for Easy Stitch Selection
The Sew-by-Color feature simplifies stitch selection by organizing stitches into color-coded categories. This intuitive system helps users quickly identify and choose the right stitch for their project. Each color represents a specific type of stitch, such as straight, zigzag, or decorative, making it easier to navigate the machine’s options. The feature reduces confusion and saves time, allowing sewists to focus on their creativity. It is a user-friendly innovation that enhances the overall sewing experience, making the Kenmore 12 Stitch Sewing Machine more accessible and enjoyable to use.
Maintenance and Care Tips
Regular cleaning, oiling, and proper storage are crucial for maintaining the Kenmore 12 Stitch Sewing Machine’s performance. These practices ensure smooth operation and extend the machine’s lifespan.
3.1 Cleaning the Machine Regularly
Cleaning the Kenmore 12 Stitch Sewing Machine regularly ensures smooth operation and prevents thread jams. Turn off the machine, unplug it, and remove any debris from the bobbin area using a small brush. Gently wipe the exterior with a soft cloth and avoid harsh chemicals. Regularly cleaning the machine helps maintain its performance and extends its lifespan. Always refer to the manual for specific cleaning instructions tailored to your model;
3.2 Oiling the Machine for Smooth Operation
Oiling the Kenmore 12 Stitch Sewing Machine is crucial for maintaining smooth operation and preventing mechanical issues. Locate the oiling points as indicated in the manual, typically near the bobbin area and shuttle hook. Use high-quality sewing machine oil, applying a few drops to the specified parts. Turn the handwheel gently to distribute the oil evenly. Avoid over-oiling, as it can attract dust and cause residue buildup. Regular oiling ensures the machine runs quietly and efficiently, extending its lifespan and performance quality.
3.3 Proper Storage to Maintain Functionality
Proper storage is essential to maintain the functionality of your Kenmore 12 Stitch Sewing Machine. Always clean the machine thoroughly before storing it in a dry, cool place away from direct sunlight. Use a protective cover to prevent dust buildup. Store the machine in its original case or a sturdy container to avoid damage. Keep accessories like presser feet and bobbins in a separate, organized compartment. Ensure the machine is completely dry and free from lint to prevent rust or mold. Regular storage maintenance ensures your machine remains in optimal condition for future use.
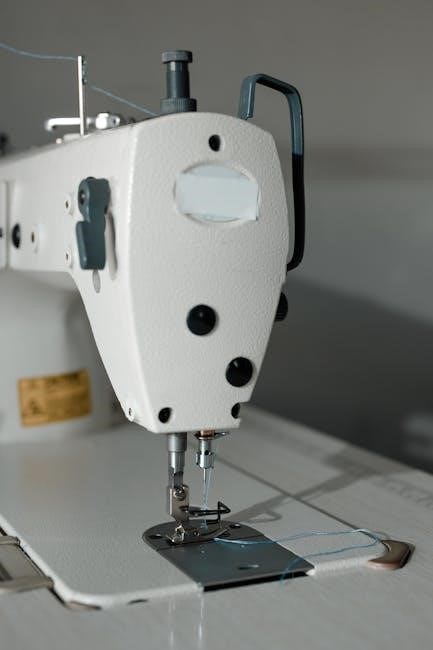
Threading the Kenmore 12 Stitch Sewing Machine
Proper threading is crucial for smooth operation. Hold the thread end, insert through the machine’s tension guides, and gently pull to seat it. Start the machine, guiding the thread through the needle. Ensure the bobbin is correctly wound and seated. Follow the manual’s step-by-step guide for accurate threading to prevent issues like thread breakage or uneven stitches.
4.1 Step-by-Step Guide to Threading the Machine
Start by turning the machine on and locating the spool pin. Place the thread on the spool, ensuring it’s secure. Gently pull the thread through the tension discs, then insert it into the take-up lever. Guide the thread down through the needle bar, leaving a small loop. Insert the needle from front to back, pulling the thread until it seats. Finally, trim excess thread close to the needle. Always refer to your manual for precise steps to avoid threading errors and ensure smooth stitching.
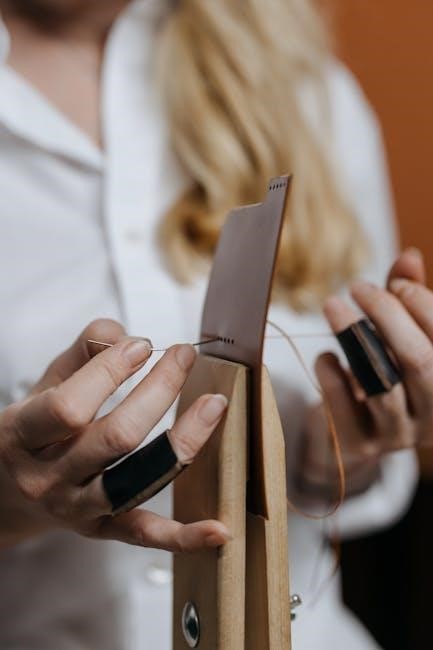
4.2 Threading the Bobbin Correctly
Wind the bobbin evenly, ensuring the thread is not too tight or loose. Insert the bobbin into the bobbin case, guiding the thread through the tension spring. Pull gently to seat the thread in the case. Place the bobbin into the machine’s bobbin area, aligning it properly. Pull the thread to ensure it’s taut and the tension is set. Always check the bobbin case alignment and clean the area before inserting the bobbin to prevent threading issues and ensure smooth stitching operation.
Understanding the Presser Feet
The Kenmore 12 Stitch Sewing Machine Manual introduces various presser feet, explaining their roles and applications. It guides users in selecting the right foot for different sewing tasks, enhancing project outcomes.
5.1 Types of Presser Feet and Their Uses
The Kenmore 12 Stitch Sewing Machine Manual details the various presser feet available. The standard foot is ideal for general sewing, while the zigzag foot suits stretch fabrics. A specialized walking foot is designed for heavy materials, ensuring smooth feeding. The manual also covers optional feet like the zipper and blind hem feet, explaining their specific uses. Understanding each foot’s purpose helps users achieve professional results by matching the right tool to their project needs.
5.2 How to Change Presser Feet Safely
To change presser feet safely, start by turning off the machine and unplugging it. Raise the presser foot to its highest position and release any additional mechanisms. Gently pull the old foot away from the machine. Align the new foot with the shank, ensuring it clicks securely into place. Lower the presser foot and test the machine at a slow speed to ensure proper function. Always follow these steps to avoid accidents and maintain optimal performance.

Troubleshooting Common Issues
This section helps identify and resolve common problems, such as thread breakage or improper stitching. It provides practical solutions and maintenance tips to ensure smooth operation.
6.1 Diagnosing and Fixing Thread Breakage
Thread breakage is a common issue that can disrupt your sewing workflow. To diagnose this, check for loose thread tension, tangled bobbin threads, or incorrect needle placement. Ensure the machine is properly threaded and the bobbin is inserted correctly. If the thread is old or of poor quality, replace it with a high-quality cotton thread. Regularly cleaning the machine and oiling it can also prevent thread breakage. Always refer to the manual for specific guidance tailored to your Kenmore model.
6.2 Adjusting Tension for Perfect Stitches
Proper tension adjustment is crucial for achieving perfect stitches on your Kenmore 12 Stitch Sewing Machine. The stitch length control regulates the length of straight stitching, with settings typically ranging from 8 to 12 stitches per inch. To ensure even stitching, check and adjust both the top thread and bobbin tension regularly. If stitches are uneven, tighten or loosen the tension dials as needed. Refer to the manual for specific guidance on tension adjustment to maintain consistent stitch quality and prevent fabric puckering or loose threads.
6.3 Preventing Common Errors
To prevent common errors, ensure proper threading and bobbin insertion as outlined in the manual. Use the correct presser foot for your fabric type and maintain consistent fabric tension. Regularly clean the machine to avoid dust buildup, which can cause mechanical issues. Always refer to the manual for specific settings and troubleshooting guidance. By following these steps, you can minimize errors and achieve professional-quality stitching with your Kenmore 12 Stitch Sewing Machine.
Sources to Download the Manual
The Kenmore 12 Stitch Sewing Machine Manual can be downloaded from Sears Parts Direct, third-party websites offering free PDFs, or purchased as high-quality paid manuals.
7.1 Official Kenmore Website and Sears Parts Direct
The official Kenmore website and Sears Parts Direct provide reliable sources to download the Kenmore 12 Stitch Sewing Machine Manual. These platforms offer free PDF downloads, ensuring easy access to detailed instructions and guides. Users can search by model number to find the specific manual for their machine. Sears Parts Direct is particularly noted for offering vintage Kenmore sewing machine manuals at no cost. This makes it a go-to destination for both new and experienced users seeking authentic operational guidance.
7.2 Third-Party Websites Offering Free PDFs
Several third-party websites provide free PDF downloads of the Kenmore 12 Stitch Sewing Machine Manual. Platforms like ManualsLib and ManualsOnline often host user-uploaded manuals, making them accessible without registration. While these sites can be convenient, users should verify the manual’s authenticity and completeness. Some third-party sources may offer older or incomplete versions, so cross-checking with official sources is recommended. Despite this, they remain a valuable resource for those seeking quick access to operating instructions. Always ensure the manual matches your specific model number for accuracy.
7.3 Paid Options for High-Quality Manuals
For users seeking high-quality manuals, paid options are available through reputable platforms. Websites offer instant downloads or printed copies of the Kenmore 12 Stitch Sewing Machine Manual for a fee, typically around $5.95. These manuals are often scanned at high resolution, ensuring clarity and readability; Paid versions may include additional resources, such as detailed diagrams or troubleshooting guides. While free options exist, paid manuals are ideal for those who want a professional-grade, comprehensive guide tailored to their specific machine model.
Accessories and Notions Compatible with the Machine
Accessories for the Kenmore 12 Stitch include presser feet, bobbins, and notions. These enhance sewing versatility and ensure optimal performance for various fabric types and projects.
8.1 Basic Accessories Included with Purchase
The Kenmore 12 Stitch Sewing Machine comes with essential accessories to get you started. These include a variety of presser feet for different sewing tasks, extra bobbins, a needle pack, and a seam ripper. Additional items like a zipper foot, buttonhole foot, and screwdriver are often provided to enhance functionality. These accessories ensure versatility and convenience, allowing you to tackle various projects with ease. They are designed to complement the machine’s features, making it a comprehensive sewing solution for both beginners and experienced sewists.
8.2 Recommended Additional Accessories
To enhance your sewing experience, consider adding optional accessories like a walking foot for heavy fabrics, a quilting foot for large projects, or an embroidery hoop for decorative stitching. An extension table provides extra workspace, while a carrying case offers convenient portability. Specialized needles, such as leather or metallic needles, can expand your machine’s versatility. These accessories are available from sewing supply stores or online retailers, allowing you to customize your setup for various sewing tasks and improve your overall creativity and efficiency.
8.3 Essential Notions for Various Projects
Essential notions for your Kenmore 12 Stitch Sewing Machine include high-quality threads, zippers, buttons, and stabilizers. Use stretch needles for knit fabrics and sharp needles for woven materials. Interfacing and batting are crucial for quilting and home decor projects. A seam ripper and measuring tape are handy tools for precision. Stock up on bobbins, pins, and scissors for efficiency. These notions ensure your projects turn out professional and long-lasting, complementing the machine’s capabilities and enhancing your sewing experience. Always choose materials suitable for your fabric type and project needs.
Stitch Length and Width Settings
Adjust stitch length and width to suit your fabric and project needs. Longer stitches are ideal for heavier fabrics, while shorter stitches work best for delicate materials.
9.1 Adjusting Stitch Length for Different Fabrics
The Kenmore 12 Stitch Sewing Machine allows easy adjustment of stitch length to suit various fabrics. Locate the stitch length control dial on the machine’s front. Turn the dial to increase or decrease the length, with settings typically ranging from 0 to 4mm. For delicate fabrics like silk, use shorter stitches (2-3mm), while heavier materials like denim require longer stitches (4mm). Proper adjustment ensures even stitching and prevents fabric damage. Always test on scrap fabric before starting your project.
9;2 Understanding Stitch Width and When to Adjust
The Kenmore 12 Stitch Sewing Machine offers adjustable stitch width to accommodate various sewing needs. The stitch width control, typically located near the stitch length dial, allows you to set the width from 0 to 5mm; Wider stitches are ideal for heavy fabrics like denim, while narrower stitches suit lightweight materials. Adjust the width for decorative stitches or when sewing multiple fabric layers. Proper width ensures even stitching and prevents fabric distortion. Always refer to the manual for specific settings tailored to your project needs.
9.3 Selecting the Right Stitch for the Job
The Kenmore 12 Stitch Sewing Machine offers 12 built-in stitches, each designed for specific tasks. Choose straight stitches for general sewing, zigzag for elastic fabrics, and decorative stitches for embellishments. Consider fabric type, seam strength, and desired aesthetics when selecting. For heavy fabrics like denim, use a wider, reinforced stitch. For delicate fabrics, opt for a narrower, lighter stitch. Always refer to the manual or stitch reference chart to ensure the best stitch selection for your project, achieving professional results every time.
Using the Manual Effectively
The Kenmore 12 Stitch Sewing Machine Manual is a comprehensive resource for mastering your machine. Use the quick start guide for beginners, understand diagrams for clarity, and reference the manual during projects to ensure optimal performance and explore all features effectively.
10.1 Quick Start Guide for Beginners
For a seamless start, the manual offers a quick guide to help beginners familiarize themselves with the Kenmore 12 Stitch Sewing Machine. Unpack and plug in the machine, then locate the power button and basic controls. Threading the machine is straightforward—follow the step-by-step guide in the manual. Select a stitch using the Sew-by-Color feature for simplicity. Start with a straight stitch on scrap fabric to test tension. Refer to diagrams for visual guidance. Practice basic stitching before moving to more complex projects. This guide ensures a confident beginning for new users.
10.2 Understanding Diagrams and Illustrations
The manual includes detailed diagrams and illustrations to help users visualize complex steps, such as threading, presser foot usage, and stitch selection. These visuals are essential for understanding machine components and operational processes. Color-coded guides simplify stitch selection, while step-by-step diagrams ensure accurate threading and bobbin setup. Illustrations also highlight proper presser foot alignment and fabric placement, making it easier to achieve professional results. Referencing these visuals enhances your ability to troubleshoot and master various sewing techniques effectively.
10.3 Referencing the Manual During Projects
Referencing the manual during projects ensures accurate use of the Kenmore 12 Stitch Sewing Machine. It provides step-by-step guidance for specific tasks, like adjusting stitches or troubleshooting issues. The manual’s clear instructions help maintain machine performance and prevent errors. Whether you’re sewing delicate fabrics or heavy-duty materials, consulting the manual ensures you’re using the correct settings and techniques. This practice enhances productivity and guarantees professional-quality results, making it an indispensable resource for both beginners and experienced sewists.
The Kenmore 12 Stitch Sewing Machine Manual is a vital resource for mastering your machine. It guides operation, maintenance, and troubleshooting, ensuring optimal performance. Explore its features confidently!
11.1 Summary of Key Takeaways
The Kenmore 12 Stitch Sewing Machine Manual is a comprehensive guide for effective operation and care. It details 12 built-in stitches, Ultra Stitch for uniformity, and Sew-by-Color for easy selection. Maintenance tips, threading guides, and troubleshooting solutions are included to ensure smooth functionality. Accessing the manual is straightforward via Sears Parts Direct or third-party sites. By following the manual, users can master their machine, explore its features, and complete projects with confidence and precision. It serves as an indispensable resource for both beginners and experienced sewists alike.
11.2 Encouragement to Explore More Features
Embrace the full potential of your Kenmore 12 Stitch Sewing Machine by exploring its advanced features. From the Ultra Stitch feature to the Sew-by-Color system, these tools are designed to enhance your sewing experience. Experiment with different stitches for various fabrics and projects, and take advantage of the machine’s versatility. By diving deeper into its capabilities, you can unlock new levels of creativity and efficiency, ensuring every project is a success. Let the manual guide you in mastering these features and discovering the endless possibilities your machine offers.