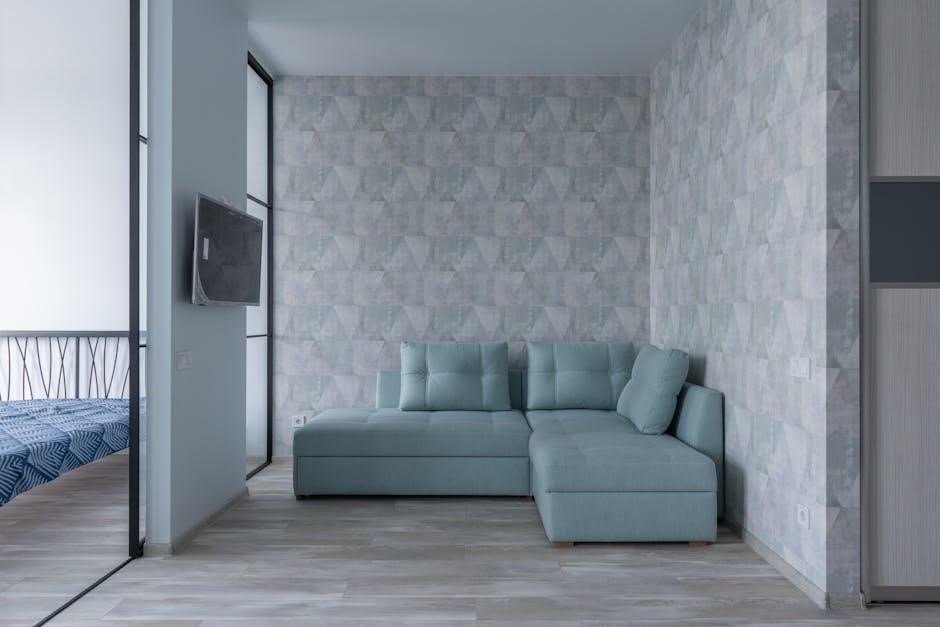
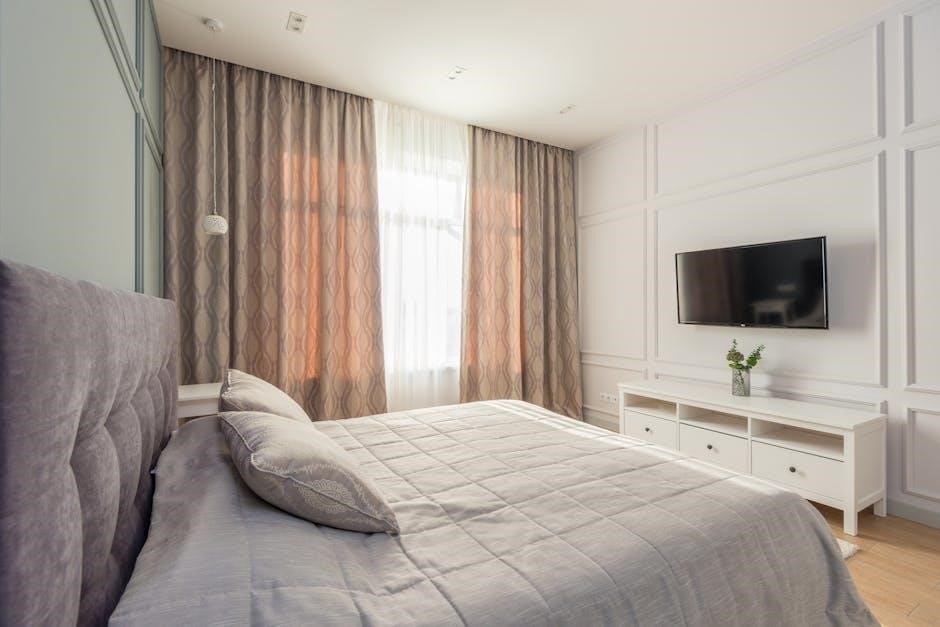
Proper TV wall mount installation ensures safety, optimal viewing, and enhances your home’s aesthetics. Follow detailed guides for secure mounting, considering weight limits, VESA standards, and wall type. Always consult professionals if unsure for the best results and safety.
1.1 Importance of Proper Installation
Proper installation ensures safety, stability, and optimal performance of your TV. Incorrect mounting can lead to equipment damage, personal injury, or poor viewing angles. Following guidelines helps prevent these risks. Securely attaching the mount to sturdy walls and using correct hardware is crucial. Proper installation also maintains warranty validity and extends the lifespan of your TV and mount. Always follow manufacturer instructions to avoid common pitfalls and ensure a reliable setup. Professional assistance is recommended for complex scenarios to guarantee safety and satisfaction.
1.2 Benefits of Using a Wall Mount
Using a wall mount offers numerous benefits, including space savings, improved aesthetics, and enhanced viewing experiences. It keeps the TV at an optimal height, reducing neck strain and glare. Wall mounts also deter theft and tampering, making them ideal for public spaces. Additionally, they allow for better cable management, creating a cleaner setup. Many mounts offer tilt, swivel, and articulation features, providing flexibility in viewing angles. Overall, a wall mount maximizes functionality while adding a modern touch to your room’s design.
Preparation Before Installation
Gather tools like a stud finder, drill, and level. Ensure compatibility by checking VESA patterns and weight limits. Verify wall strength and prepare materials for a secure setup.
2.1 Gathering Necessary Tools and Materials
To ensure a smooth installation, gather essential tools and materials. These include a stud finder, drill, level, screwdrivers, and wall anchors. Measure your TV’s VESA pattern to confirm compatibility. Collect the mounting hardware from the kit, such as screws, brackets, and spacers. Check the weight limit of the mount and ensure it matches your TV’s weight. Review the manual for specific requirements. Organize all components beforehand to avoid delays. Proper preparation prevents installation issues and ensures safety. Always verify compatibility before starting.
2.2 Understanding VESA Standards for TV Mounting
Understanding VESA standards is crucial for proper TV mounting. VESA (Video Electronics Standards Association) defines the mounting pattern on the back of TVs. Measure the horizontal and vertical distances between screw holes to determine your TV’s VESA dimensions. Ensure the wall mount matches these measurements for compatibility. Mismatched mounts can lead to instability or damage. Always refer to your TV’s manual for precise measurements to guarantee a secure and properly aligned installation. Proper alignment ensures safety and optimal viewing.
2.3 Checking TV and Wall Compatibility
Ensure your TV and wall are compatible before installation. Verify the wall type (wood stud, concrete, or brick) and check if it can support the TV’s weight. Use appropriate anchors for stability. Measure the TV’s VESA pattern and ensure the mount matches. Check the wall’s strength to handle the weight safely. Refer to the TV’s manual for specific guidelines. Proper compatibility ensures a secure and stable installation, preventing potential hazards or damage. Always confirm these details before proceeding to guarantee a safe setup.
Safety Considerations
Ensure the mount’s weight capacity exceeds your TV’s weight. Verify wall strength and use appropriate anchors. Avoid hazards like unstable mounts. Consult professionals if unsure for safety.
3.1 Weight Limits and Load Capacity
Always verify the weight limits of your TV wall mount to ensure it can safely support your television. Exceeding the maximum load capacity risks damage or collapse. Check the mount’s specifications and your TV’s weight. Ensure the wall type and anchors used can handle the combined load. Use VESA-compatible mounts for proper fit. Never exceed the recommended weight, as overload can lead to instability or failure. Refer to your TV’s manual for precise weight and mounting requirements.
3.2 Ensuring Wall Strength and Stability
Ensure the wall can support the combined weight of the TV and mount. Check the wall type—wood studs, concrete, or drywall—and use appropriate anchors. For drywall, use sturdy anchors to prevent the mount from pulling loose. Verify the wall’s load capacity and ensure it meets the mount’s specifications. If unsure, consult a professional, especially for concrete or brick walls. Proper installation ensures stability and prevents potential hazards. Always follow manufacturer guidelines for secure mounting.
3.3 Avoiding Common Safety Hazards
Avoid common safety risks by adhering to weight limits and using proper installation techniques. Ensure the wall mount is securely fastened to prevent the TV from tipping or falling. Use appropriate anchors for your wall type to distribute weight evenly. Never exceed the mount’s load capacity, as this can lead to structural failure. Regularly inspect the mount for loose screws or damage. Additionally, avoid installing near unstable surfaces or areas prone to moisture, which could weaken the setup over time. Always follow manufacturer guidelines to minimize potential hazards.
Step-by-Step Installation Guide
Follow a detailed guide to secure your TV. Prepare the TV, attach brackets, drill into the wall, and mount. Adjust for optimal viewing and ensure stability.
4.1 Preparing the TV for Mounting
Start by removing any stands or bases from the TV. Identify the VESA mounting holes on the back of the TV and measure the pattern. Clean the area around the holes to ensure proper contact. Center the mounting brackets on the TV, ensuring they align with the VESA holes. Use spacers if provided to maintain a gap for cables. Double-check the alignment and secure the brackets firmly. Have a second person assist to prevent dropping the TV. Use a soft cloth to protect the screen during handling.
4.2 Attaching the Wall Plate to the Mount
Attach the wall plate to the mount by aligning the screw holes. Secure it using the provided bolts, ensuring a tight fit. Position the mount on the wall, checking the alignment with a level. Mark drill points for screws. For stability, use wall anchors if necessary. Tighten all screws firmly to prevent any movement. Ensure the mount is sturdy and level before proceeding. Double-check the manufacturer’s instructions for specific bolt types and torque requirements; A secure wall plate ensures the TV’s safety and proper installation.
4.3 Drilling and Anchoring the Wall Plate
Drill pilot holes into the wall at marked points, ensuring they align with the wall plate’s screw holes. Use a level to confirm accuracy. For drywall, insert anchors to prevent screws from loosening over time. In concrete or brick walls, use sturdy masonry bits and anchors. Wood stud walls typically require no additional anchors. Tighten screws firmly but avoid over-tightening, which could damage the wall or mount. Ensure the wall plate is secure and level before proceeding. If unsure, consult a professional to guarantee stability and safety.
4.4 Mounting the TV on the Wall Plate
Lift the TV carefully and align its mounting holes with the wall plate’s hooks or brackets. Gently lower the TV onto the plate, ensuring it clicks securely into place. Use a level to verify the TV is straight. Tighten the screws or clips provided with the mount to hold the TV firmly. Ensure all connections, such as HDMI cables, are accessible and not pinched. Double-check the TV’s stability by gently rocking it side to side. If it feels loose, adjust the screws or consult the manual for further guidance.
4.5 Adjusting and Securing the TV
Once the TV is mounted, adjust its position for optimal viewing. Use the tilt, swivel, or articulating features to achieve the desired angle. Tighten all screws securely to prevent movement. Double-check the TV’s level and stability. Ensure all cables are neatly managed and not pinched. Test the TV’s stability by gently rocking it. If adjustments are needed, loosen the screws slightly, reposition, and tighten again. Finally, verify that the TV is securely fastened to the wall plate and all connections are accessible and properly secured.
Types of Wall Mounts
Fixed mounts offer flush installation, while tilt mounts allow angle adjustments. Swivel and articulating mounts provide flexibility, and motorized mounts enable smart, automated positioning for optimal viewing experiences.
5.1 Fixed Mounts for Flush Installation
Fixed mounts provide a sleek, low-profile installation, holding the TV flush against the wall. They are ideal for modern aesthetics and offer a sturdy, non-adjustable solution. Ensure VESA compatibility and follow installation steps: attach brackets to the TV, align with the wall plate, and secure. Perfect for permanent setups, fixed mounts enhance visual appeal while maintaining stability. Always check weight limits and wall strength for safe installation. This type is recommended for those seeking a clean, minimalist look with no need for tilt or swivel adjustments.
5.2 Tilt Mounts for Adjustable Viewing Angles
Tilt mounts offer flexibility by allowing vertical angle adjustments, reducing glare and improving viewing comfort. Install by attaching the tilting mechanism to the wall and TV. Ensure VESA compatibility and secure the mount to sturdy wall anchors. Tilt mounts are ideal for rooms with varying lighting conditions or multiple viewing positions. Follow instructions carefully to avoid hardware issues. This option balances functionality and simplicity, making it a popular choice for enhancing home entertainment setups. Proper installation ensures smooth tilt adjustments for years of reliable use.
5.3 Swivel and Articulating Mounts for Flexibility
Swivel and articulating mounts provide maximum flexibility, allowing TVs to rotate and extend from the wall. They are ideal for multi-room viewing and corner placements. Installation involves attaching a robust arm mechanism to the wall and TV, ensuring VESA compatibility. These mounts often include tilt and pivot features, enhancing adjustability. Follow manual instructions precisely to ensure stability. Perfect for dynamic spaces, swivel mounts offer unmatched versatility, making them a top choice for modern homes seeking customizable entertainment solutions. Proper installation ensures smooth, quiet operation and long-lasting durability.
5.4 Motorized Mounts for Smart Homes
Motorized mounts offer advanced automation, ideal for smart home integration. They allow automatic height, tilt, and swivel adjustments via remote or voice commands. Installation requires precise alignment and wiring, often needing professional assistance. These mounts enhance viewing comfort and are perfect for modern, tech-savvy homes. Follow the manufacturer’s instructions to ensure proper synchronization with smart systems. Motorized mounts combine luxury, convenience, and seamless control, making them a premium choice for those seeking cutting-edge home entertainment solutions. Always check compatibility with your TV and smart home system for optimal performance.
Specialized Installation Scenarios
Address unique challenges like mounting on wood studs, concrete, brick, or drywall. Each requires specific techniques and tools for secure installation, ensuring stability and safety in various setups.
6.1 Mounting on Wood Stud Walls
Mounting on wood stud walls requires locating the studs to ensure stability. Use a stud finder to identify the wall’s wooden framework. Once located, attach the wall mount bracket using screws designed for wood. Ensure the weight of the TV does not exceed the mount’s capacity. Double-check the alignment and tighten all screws securely. For added stability, consider using wall anchors if the studs are spaced widely. Always refer to the manufacturer’s instructions for specific hardware recommendations. Proper installation ensures a sturdy and safe setup, preventing potential damage or hazards.
6.2 Mounting on Concrete or Brick Walls
Mounting on concrete or brick walls requires sturdy anchors to ensure stability. Use a hammer drill to create pilot holes, then insert masonry anchors or wall plugs. Screw the wall mount bracket into these anchors, ensuring it is level and secure. The wall must support at least five times the TV’s weight. Double-check the alignment and tighten all screws firmly. For added safety, verify the integrity of the wall and anchors before hanging the TV. Proper installation ensures a reliable and long-lasting setup on solid surfaces.
6.3 Mounting on Drywall with Proper Anchors
Mounting a TV on drywall requires specialized anchors to prevent damage and ensure stability. Locate the wall studs using a stud finder to determine the best position. Use high-quality drywall anchors, such as Molly bolts or toggle bolts, to secure the wall plate. Drill pilot holes carefully and insert the anchors, then screw the mount into place. Ensure the mount is level and tightly fastened. For added stability, consider using a mount with a reinforced bracket; Always check the weight limit of the anchors to avoid overloading. Proper installation ensures a safe and durable setup on drywall surfaces.
Troubleshooting Common Issues
Identify uneven alignment or loose screws causing instability. Check hardware compatibility and weight limits. Use a spirit level to ensure proper alignment and tighten all connections securely for stability.
7.1 TV Not Level After Installation
If your TV appears uneven after installation, check the wall mount’s leveling mechanism. Ensure all screws are tightened evenly. Use a spirit level to verify alignment. If issues persist, adjust the mount’s tilt or swivel features. Double-check the VESA plate alignment on the TV. Loosen mounting screws slightly, reposition the TV, and retighten. If the problem remains, reinstall the wall plate or consult the installation manual for further guidance. Proper leveling ensures optimal viewing and prevents long-term damage.
7.2 Mounting Hardware Not Fitting
If the mounting hardware doesn’t fit, verify the VESA compatibility between your TV and mount. Ensure screws match the TV’s mounting holes. Check for spacers or adapters included with the TV. If using drywall anchors, confirm they suit the wall type. Consult the manual for alternative hardware solutions. If issues persist, contact the manufacturer or consider consulting a professional installer. Proper hardware fitment is crucial for stability and safety. Always double-check measurements and compatibility before proceeding with installation.
7.3 Weight Distribution Problems
Weight distribution issues can cause instability. Ensure the mount is rated for your TV’s weight and properly installed. Check if the wall plate is securely anchored to studs or reinforced with appropriate anchors. Uneven weight distribution may require adjusting the TV’s position on the mount. Tighten all screws firmly and verify balance. If problems persist, consider consulting the manual or a professional. Proper weight distribution ensures safety and prevents damage to both the TV and wall, ensuring a secure and stable installation every time.
Maintenance and Upkeep
Regularly inspect the mount for loose screws, dust, and debris. Clean the mount and TV surface gently. Ensure all connections remain secure and tighten screws periodically. Check for wear and tear on moving parts and update hardware if necessary to maintain stability and safety.
8.1 Cleaning the Mount and TV
Regular cleaning is essential for maintaining the functionality and appearance of your TV mount and screen. Use a soft, dry cloth to wipe down the mount, removing dust and debris. For the TV, dampen a microfiber cloth with water, avoiding harsh chemicals or liquids that could damage the screen. Gently clean the display, ensuring no streaks or residue remain. Avoid spraying liquids directly on the TV or mount to prevent damage. Clean the mount’s moving parts periodically to ensure smooth adjustment. Regular maintenance helps extend the lifespan of both the TV and mount, ensuring optimal performance and safety.
8.2 Checking for Loose Screws Periodically
Regularly inspecting the screws and bolts on your TV mount ensures stability and safety. Over time, vibrations or adjustments can cause screws to loosen. Use a screwdriver to tighten any loose connections, paying attention to the wall plate, arms, and TV brackets. Check after installation, after adjustments, and periodically thereafter. This simple maintenance step prevents potential damage or accidents. Ensure all hardware remains secure to maintain the integrity of the mount and protect your TV. Tightening screws is a quick and effective way to uphold safety and functionality. Schedule periodic checks for optimal results.
8.3 Updating Mounting Hardware as Needed
Over time, mounting hardware may wear out or become outdated. Regularly inspect brackets, arms, and wall plates for signs of damage or corrosion. If any component shows excessive wear, replace it immediately to ensure stability. When upgrading your TV or changing the mount type, verify compatibility with current hardware. Refer to the manufacturer’s guidelines for compatible replacements. Updating hardware enhances safety, prevents potential accidents, and ensures optimal functionality. Stay proactive to maintain your TV’s secure and proper installation over time.
Ensure all connections are secure, test the TV’s stability, and make final adjustments for optimal viewing. Verify weight distribution and hardware integrity for long-term safety and performance.
9.1 Ensuring All Connections Are Secure
Double-check all screws, bolts, and brackets to ensure they are tightly secured. Verify that the TV is properly hooked onto the wall mount and that all hardware is in place. Tighten any loose connections and ensure the mount is firmly attached to the wall. Confirm that the TV’s weight is evenly distributed and that the mount can support it without shifting. Refer to the manufacturer’s manual for specific torque settings and connection guidelines to guarantee a safe and stable installation.
9.2 Testing the TV’s Stability
After installation, gently rock the TV from side to side to ensure it is stable and securely mounted. Check for any wobbling or movement, which could indicate loose screws or improper mounting. Verify that the TV remains level and does not tilt unexpectedly. If any instability is detected, tighten the necessary connections and retest. This step is crucial to prevent accidents and ensure the TV remains safely mounted on the wall for long-term use.
9.3 Final Adjustments for Optimal Viewing
Once the TV is mounted, make final adjustments to achieve the best viewing experience. Check the TV’s alignment and ensure it is level. Tilt or swivel the mount as needed to eliminate glare and achieve the desired viewing angle. Test the TV from different positions in the room to confirm optimal visibility. If using an articulating or motorized mount, adjust the settings to your preferred position. Refer to the user manual for specific adjustment features. These final tweaks ensure a professional setup and enhance viewer satisfaction.
Additional Resources
Consult manufacturer manuals, online guides, and professional services for further assistance. These resources provide detailed instructions, troubleshooting tips, and expert advice for a successful TV wall mount installation.
10.1 Manufacturer’s Support and Manuals
Manufacturer-provided manuals are essential for successful TV wall mount installation. They include specific instructions, VESA compatibility details, weight limits, and troubleshooting tips. Always refer to these guides for accurate mounting procedures tailored to your TV model. Many manufacturers also offer online support, FAQs, and downloadable PDF resources. These materials ensure compliance with safety standards and optimal mounting configurations. For complex setups or specialized wall types, manufacturer support can provide additional guidance or recommend certified professionals for assistance. Ensure to review all provided documentation before starting the installation process.
10.2 Online Tutorials and Guides
Online tutorials and guides provide step-by-step instructions for TV wall mount installation. Websites offer comprehensive manuals, video tutorials, and troubleshooting tips. These resources cover VESA standards, weight limits, and compatibility checks. Many guides include diagrams and photos for clarity. They often address common issues like uneven walls or hardware fitting problems. Additionally, forums and expert blogs share tips for specialized installations, such as concrete or drywall mounting. Online resources are invaluable for DIY enthusiasts, offering detailed insights to ensure a secure and level installation. They help users avoid costly mistakes and achieve professional results.
10.3 Professional Installation Services
Professional installation services offer expert solutions for TV wall mounting. Certified technicians handle complex setups, ensuring safety and optimal placement. They assess wall types, use appropriate anchors, and level the TV perfectly. Services often include cable management and hidden wiring for a sleek look. Technicians are trained to handle various mount types, from fixed to motorized models. Hiring professionals reduces risks like wall damage or equipment misuse. They provide warranties and support, guaranteeing a flawless setup tailored to your space and viewing preferences. This ensures a secure, stylish, and functional installation.